(Install LAMP) Writing an Apache or WordPress introduction will do no good due to the fact that both of them, combined together, are one of the most used Open Source Web Servers on the Internet today, in fact, Apache runs on 36.9% world web servers and WordPress on one of every 6 websites – Apache with MYSQL and PHP providing the dynamic server gateway interface for WordPress Publishing Content Management.
This topic explains the steps needed to be processed in order to install the latest version of WordPress on top of LAMP, which stands for Linux, Apache, MySQL/MariaDB, PHP and PhpMyAdmin on Debian, Ubuntu and Linux Mint, with basic Apache Virtual Host configurations and MySQL database access through command-line or PhpMyAdmin Web Interface, but be aware that does not cover other important network service configurations, like an IP name mapping provided by DNS server and simply uses the rudimentary system hosts file for IP name transactions (DNS query).
Also, the forward settings are available on almost all Debian systems with slight differences (most of them regarding apache paths), which will be noted at the proper time.
Installing LAMP Stack on Server
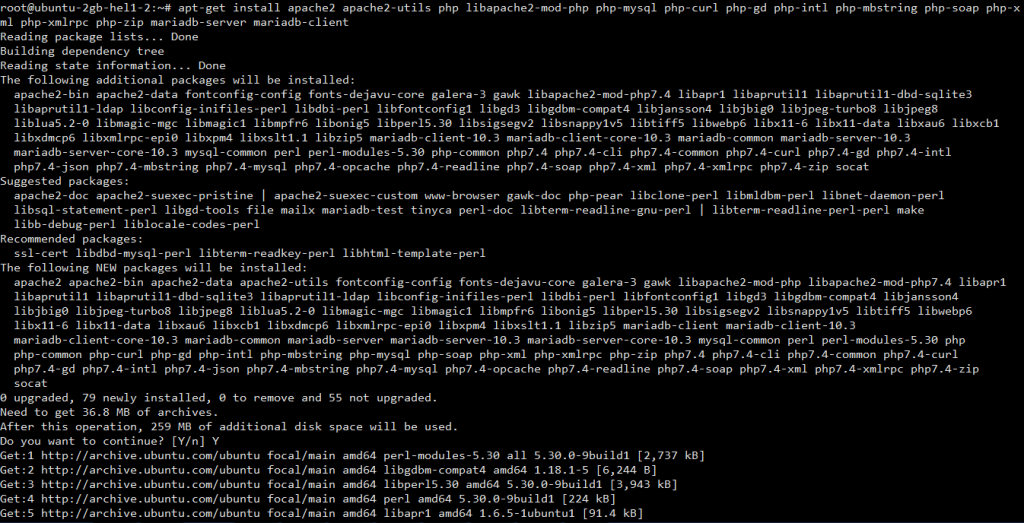
1. Now it’s time to install a LAMP stack, run the following ‘apt-get’ command to install Apache, MySQL, and PHP.
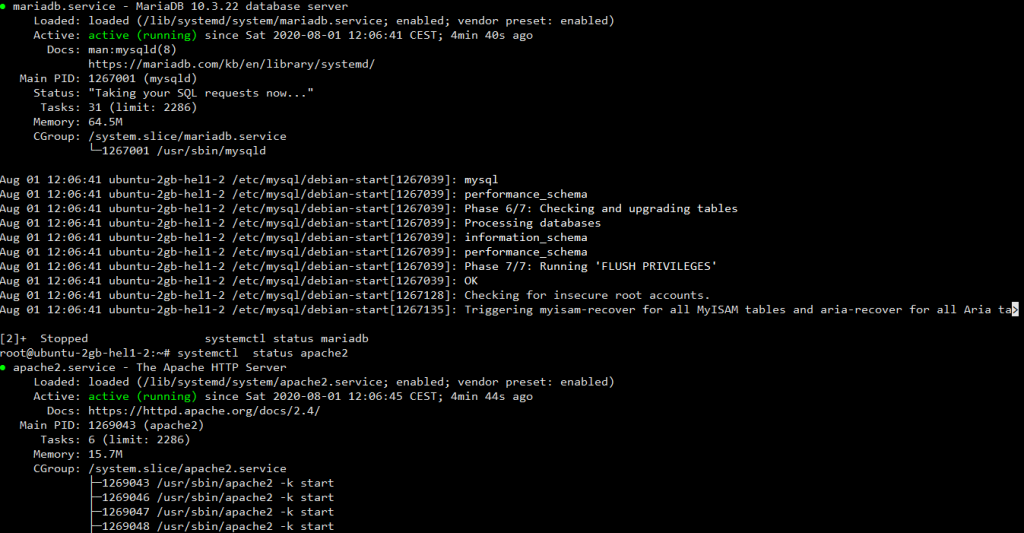
and result you have installed Apache and mariadb and PHP look like :
Installing the PhpMyAdmin Administration Tool
2. Now we are going to install PhpMyAdmin Web Interface – A tool that can help you with administering MySQL databases.
Run the following command line, select Apache web server and do not configure a database for PHPMyAdmin with

Configure Web Server for PhpMyAdmin

3. After PhpMyAdmin had been installed is time to make it accessible for web browsing and for that Apache web server needs to read its configurations file.
To enable PhpMyAdmin you must copy 'apache.conf' PhpMyAdmin configuration to 'conf-available' Apache path and enable the new configuration.
For this, run the following series of commands on Ubuntu and Linux Mint systems
$ sudo mv /etc/apache2/conf-available/apache.conf /etc/apache2/conf-available/phpmyadmin.conf
$ sudo a2enconf phpmyadmin
On Debian systems, issue the following commands.
$ sudo mv /etc/apache2/conf.d/apache.conf /etc/apache2/conf.d/phpmyadmin.conf
4. To access PhpMyAdmin, open a web browser, and navigate to the below address.
http://IP-Address-or-Domain/phpmyadmin/

Creating Apache Virtual Host for Domain
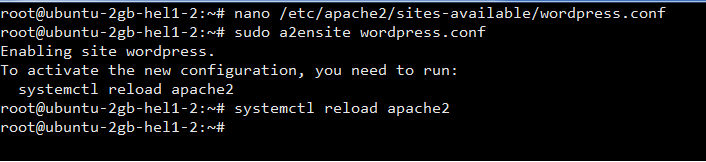
5. The next step is to create a Virtual Host on the Apache web server that will host the WordPress new domain. To create and activate a new Virtual Host, open a text editor and create a new file named, suggestive, 'wordpress.conf' on '/etc/apache2/sites-available/' path by running the following command.
Add the following directives at the bottom of the file. Save and Close the file.
<VirtualHost *:80>
        ServerName server1.dade2.net
        ServerAdmin webmaster@localhost
        DocumentRoot /var/www/html
        ErrorLog ${APACHE_LOG_DIR}/error.log
        CustomLog ${APACHE_LOG_DIR}/access.log combined
</VirtualHost>

Then activate the new virtual host with this command.
$ sudo systemctl reload apache2
6. To avoid that future Apache error concerning, ServerName FQDN missing open main configuration file '/etc/apache2/apache2.conf', add the following line at the bottom of the file and restart service
ServerName server1.dade2.net
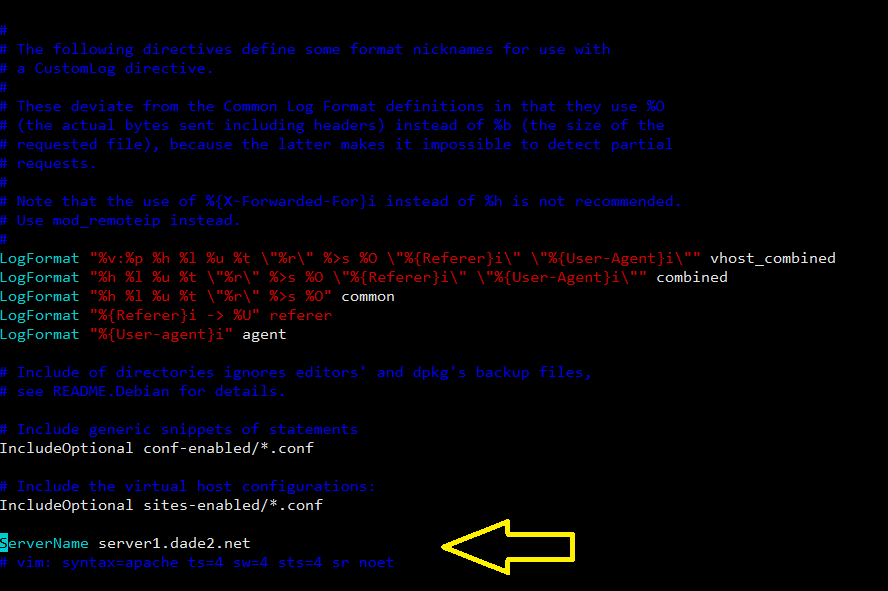
7. Restart the apache2 service.
Creating WordPress Database for Domain
8. Now is time to create a new database and a new database user for WordPress. There are two ways of doing this, either through the MySQL command line, which is also the most secure way or by using the PhpMyAdmin web tool. On this topic, we cover a command-line way.
But first of all, you need to make your MySQL installation secure by running the following security script and answer YES on all questions to harden your SQL database security settings.
in this process, You will be asked to Set root Password, Remove anonymous users, Disallow root login remotely, Remove test database, Reload privilege tables, and need Enter ” Y ” to do them.
- Enter current password for root (enter for none):
Enter - Set a root password? [Y/n]
y - Remove anonymous users? [Y/n]
y - Disallow root login remotely? [Y/n]
y - Remove test database and access to it? [Y/n]
y - Reload privilege tables now? [Y/n]
y

9. Now is time to actually create a WordPress database by connecting to mysql shell as a root user.
in above example mysite is our database name and mysiteadmin is our database user and SecureP@ssHere! our db user password .
Installing WordPress on Domain (LAMP)
10. After all Apache nasty server configurations had been made and MySQL database and the administrative user had been created it’s now time to actually perform WordPress installation on our box.
First of all download the latest WordPress archive by issuing the following wget command.
$ wget http://wordpress.org/latest.tar.gz

11. Next extract WordPress archive and copy all extracted files to Apache Virtual Host DocumentRoot, that will be '/var/www/html' on Ubuntu and Linux Mint systems.
$ sudo tar xvzf latest.tar.gz
$ sudo cp -r wordpress/*  /var/www/html
On Debian systems, run the following commands.
$ sudo tar xvzf latest.tar.gz
$ sudo mkdir -p  /var/www/html
$ sudo cp -r wordpress/*  /var/www/html
12. Before starting WordPress installer make sure that Apache and MySQL services are running and also run the following commands to avoid ‘wp-config.php‘ error file creation – we will revert changes afterward.
$ sudo service apache2 restart
$ sudo service mysql restart
$ sudo chown -R www-data  /var/www/html
$ sudo chmod -R 755  /var/www/html
13. Open a browser and enter your server’s IP or virtual domain name on URL using the HTTP protocol.
http://server1.dade2.net/index.php
http://your_server_IP/index.php
14. On the first prompt select your Language and hit Continue.
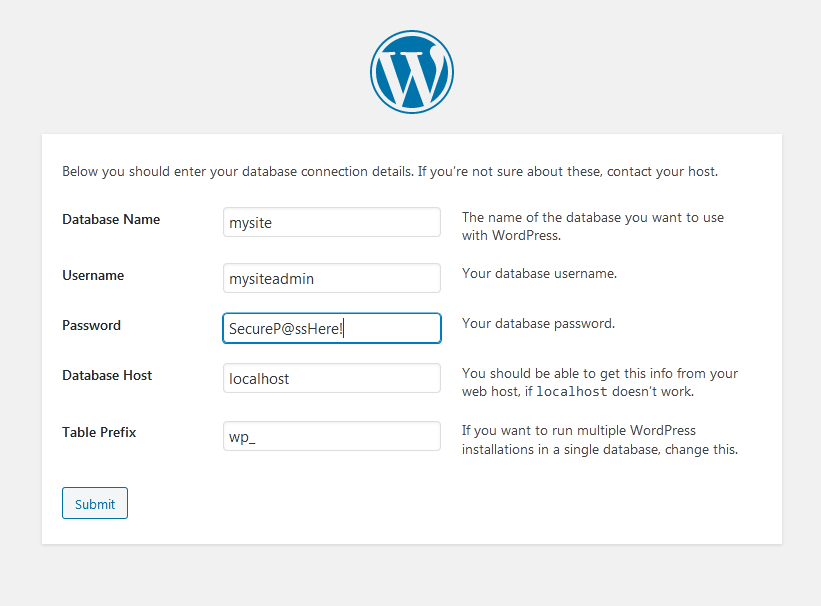
15. On the next screen enter your MySQL wordpress database name, user, password, and host, then hit on Submit.
16. After the installer successfully connects to MySQL database and completes ‘wp-config.php‘ file creation hit ‘Run‘ the install button and provide WordPress installer with a Site Title, administrative username, and password for your blog, email address and finally click on Install WordPress.
17. After the installation completes you can login to your new WordPress website blog using your administrative credentials and starts to customize your blog from Dashboard or add new cool articles for millions of readers worldwide or just you!
18. One more last step is to revert changes made on '/var/www/html‘ directory and file permissions.
$ sudo chown -R root /var/www/html
That’s all the steps needed for a complete WordPress installation on Debian, Ubuntu, Linux Mint, and most of all Debian based Linux distributions using Apache web server, but still, this subject is so vast that only the basic part has been covered.
For a complete environment, you will also need to install and set up a DNS server, enable complex Apache ‘.htacccess‘ rules and, if security demands it, enforce SSL on a Web server.
Enable HTTPS on WordPress
19. If you want to enforce HTTPS on your WordPress website, you need to install a free SSL certificate from Let’s Encrypt as shown.
$ sudo apt-get update
$ sudo apt-get install software-properties-common
$ sudo add-apt-repository universe
$ sudo apt-get update
$ sudo apt-get install certbot python3-certbot-apache
$ sudo certbot --apache
21. To verify that your WordPress site uses HTTPS, visit your website at https://yourwebsite.com/ and look for the lock icon in the URL bar. Alternatively, you can check your site’s HTTPS at https://www.ssllabs.com/ssltest/.
Troubleshooting of Installing WordPress on LAMP :
it may you face problem during wordpress installing on LAMP , if you see any related “File permission problem on Ubuntu Lamp server” you can fix it by following command :
sudo chown -R www-data:www-data /var/www